Duotone:


Image and Text:

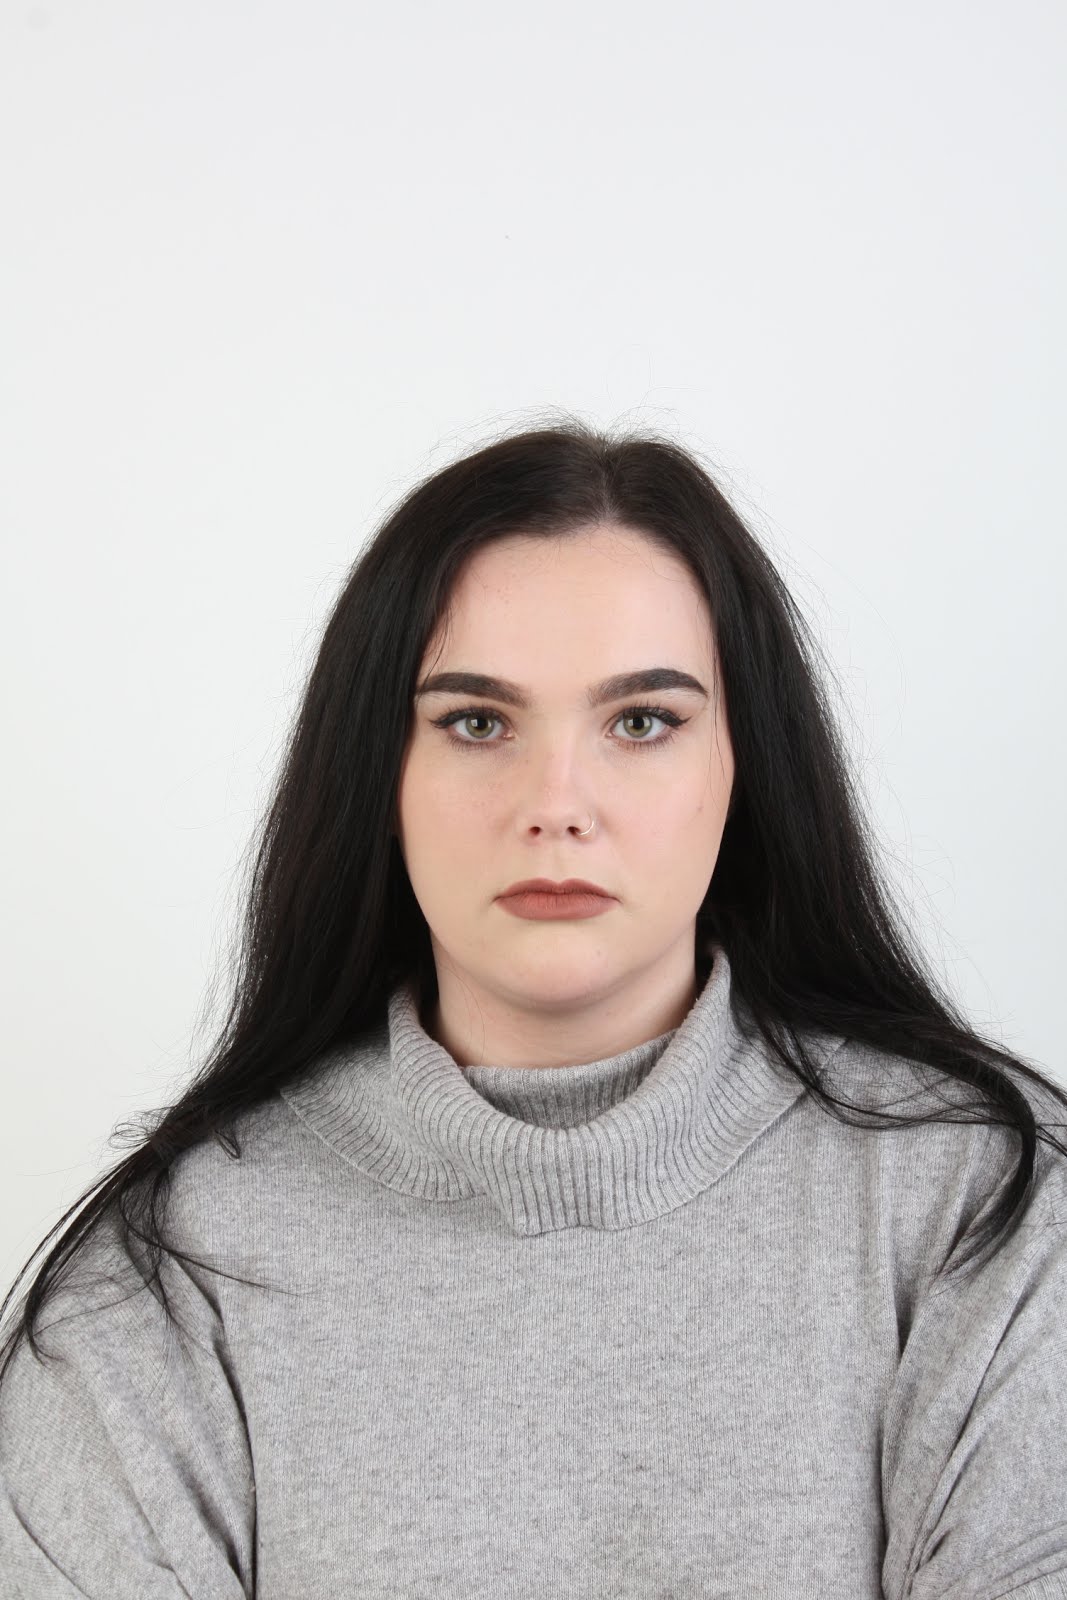


Image within Image:


Montage:


Repetition:


Selective Colourisation:


Editing Processes -
Duotone:


I began by going to the 'Image' drop-down bar, where I chose 'Mode' and the selected 'Grayscale'.
Next, I returned to 'Image' and again chose 'Mode' but this time I selected 'Duotone'.
When the duotone settings box appears, select the type as 'Duotone' and this allows you to use two colours rather than one. Then select the colour box and customise your colours; I chose pink and blue to study ideas of gender stereotypes and how when we come together gender labels can change.
Finally, I went down to the 'Brightness/ Contrast' tool where I adjusted the image using the bars until I was satisfied with the outcome of the duotone.
Image and Text:

Begin by selecting the 'T' tool, this is the text tool, on the side bar.
Next, draw the box over the chosen area.
Finally, when the text colour box appears select the text colour and press 'OK'. Also, I changed the font size by using the 'tT' size selection along the top bar; font can also be changed using the tool next to this.
Image within Image:


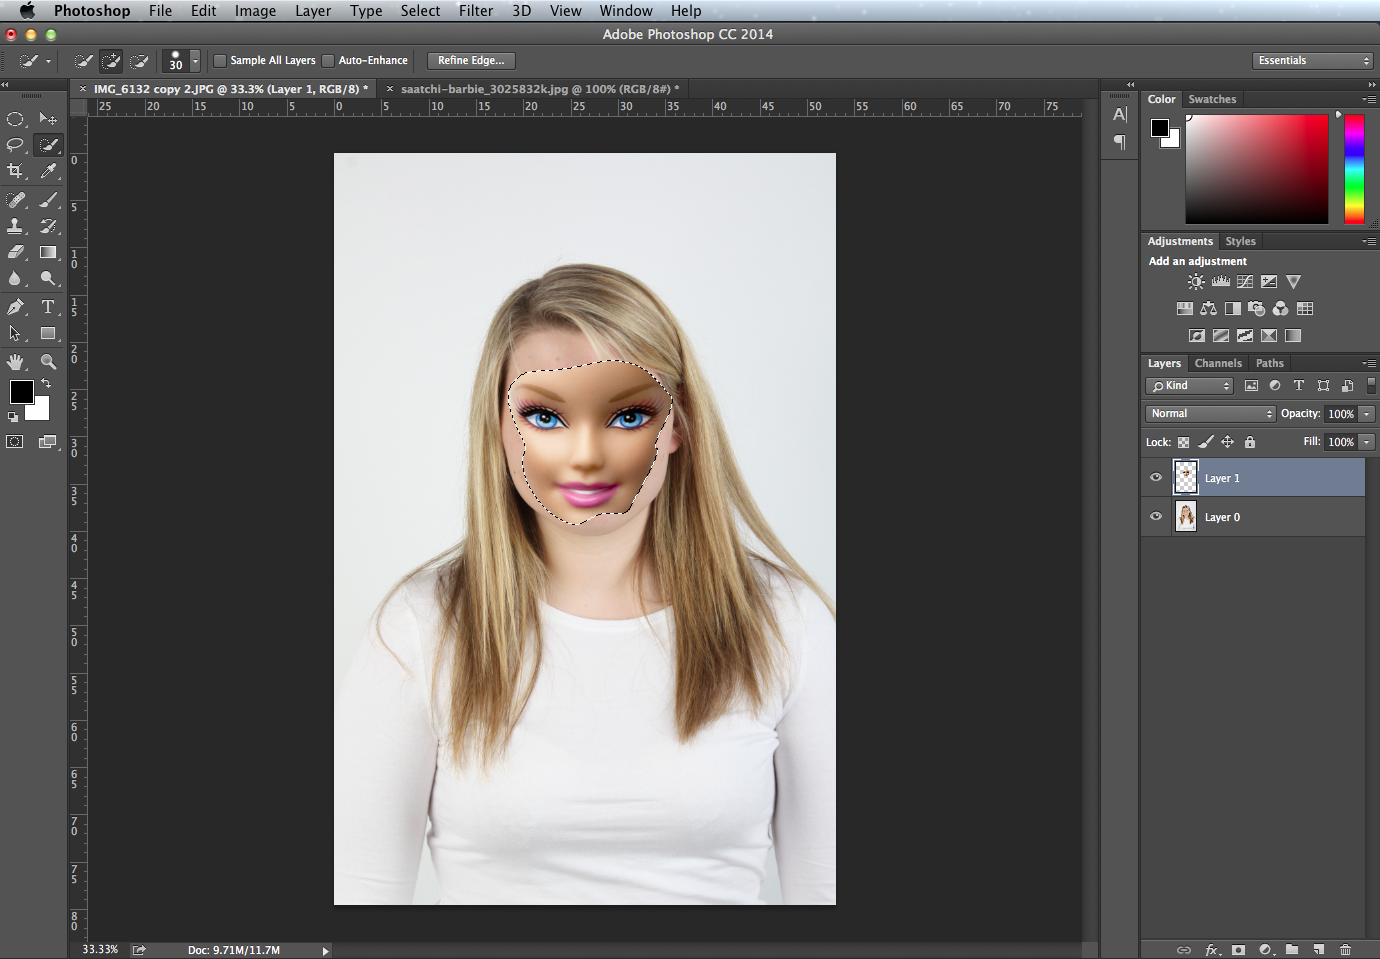


First of all use the 'Pen Tool' and roughly select the outline of the face. Then right click and press the 'Make Selection' and finish this action by pressing 'OK'.
Then, go to 'Edit' and 'Copy' the selected section. Change to the other image/ base layer and 'Edit' then 'Paste'.
On the second layer select the face using the 'Quick Selection Tool'. Go to the bottom layer and select 'Edit' then 'Clear'.
Furthermore, enlarge the second layer with the 'Edit' then 'Free Transform' tool.
Shift and select both layers, 'Edit' and then 'Auto-Blend Layers'. Select the 'Panorama' option on the box that has appeared and press 'OK'. If there is any overlap from the base image then use the 'Clone Stamp' tool to eradicate this, although my image did not need this.
Montage:


Start with 'File', 'New' and select 'International Paper'.
Open multiple images and edit these using the 'Crop Tool'. After cropping each image drag them across onto the A4 background. Then edit them using 'Edit' and 'Free Transform' until the images begin to fit together.
Repeat this and layer the images until they compose a recognisable portrait.
Repetition:


To begin with, choose 'File', then 'New' and select 'International Paper'.
Open two different images. Drag two of each image onto the A4 background layer. Select 'Edit' and 'Transform' and 'Scale' all of the images; using one of each image 'Rotate 180*' so that the images are repeated in an almost opposite reflection style.
Selective Colourisation:


Firstly, begin by choosing the 'Quick Selection Tool' and select the outline of the portrait.
Go to 'Hue and Saturation' and use the sliding bars to adjust the 'Hue' of the portrait.
some excellent work here well done...
ReplyDelete